Back to CapitalForecastDirect Main Menu
Adding Warranties
In Capital Forecast, you can easily keep track of your building component or equipment warranties. If a warranty contains an attachment, the attachment will appear on any needs tied to the equipment and building components the warranty is associated with.
Adding Warranties
- Click the Warranties link found under the Information & Analysis section of your home page.
- Click Add New Item.
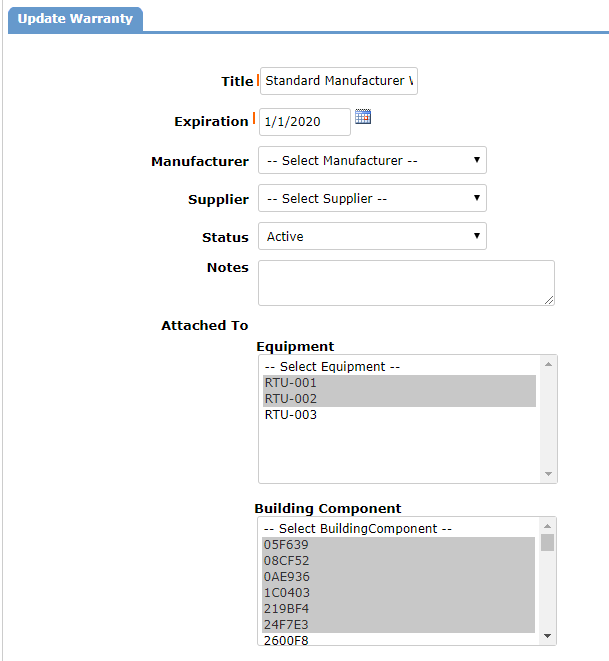
- Enter a Title for the warranty.
- Click the calendar icon and choose the warranty Expiration date.
- If the warranty is specific to a Manufacturer or Supplier, select the appropriate option in these fields.
- The Status field will automatically populate based on the Expiration date that was entered.
- Enter any Notes if necessary.
- Select the Equipment and/or Building Components this warranty should be attached to. A Warranty can be attached to as many pieces of equipment and building components as needed. To select multiple items, hold the Ctrl key on your keyboard while making your selections.
- If you would like to add any additional documentation to the Warranty, click the Add New Attachment link.
- In the Attach File window, choose whether you would like to attach a File or a Link from the web.
- Type the file Description.
- If you selected to attach a file, click the Choose File button to select the file from your computer. *Note: The size limit for attachments is 5MB.
- If you selected to attach a link, enter the URL.
- Click Save to add the file attachment to the Warranty.
- Once the attachment has been added to the Warranty, you can edit the file by clicking the pencil icon (
 ) or delete the file by clicking the delete icon (
 ).
).
- Click the Save button.